38 Superb AutoCAD Layer Tools

While AutoCAD has plethora of different tool sets, mastering the AutoCAD Layer tool is fundamental to effectively using this CAD software. The Layer Tool helps organize and control drawing elements, allowing you to manage visibility, line thickness, line type and other characteristics of objects. In this blog we will explore 38 different aspects to the layer tool in AutoCAD that will enhance your drafting capabilities.
Checkout Layers
You can checkout the list of all layers in a snapshot by clicking on the Layer drop down menu in the Layer Tab (Home > Layer > Layer Drop Down Menu). Here you will see layers list and be able to edit some properties such as turn a layer on/off, freeze/thaw a layer/ lock/unlock a layer, and change color of a layer.
The AutoCAD Layer Properties Manager
To get more detailed information and layer editing options, click on the Layer Properties Manager in the Layer Tab. You can also type LAYER in the command line to open the Layer Properties Manager. To me, the Layer Properties Manager is the layer control panel. It has a lot of features which I will be going in later parts of the blog.

Creating a New Layer
There are two major ways to create new layers in AutoCAD:
– Home > Layer Tab > Layer Properties Manager > New Layer
– When in the the Layer Properties Manager, you can create a new layer by using the keyboard shortcut Alt+N.

Renaming a Layer
There are two major ways to rename a layer in AutoCAD:
– Right click on the layer in the Layer Properties Manager and click on Rename Layer.
– Click once on the Layer Name that you want to change and you will be able to rename the later.

AutoCAD Layer Naming Conventions
While you are free to name your layer as you wish there are United States National CAD Standards which provides guidelines to name layers in AutoCAD. In my professional career, I have always seen Civil Engineers, Architects, Landscape Architects, Surveyors, and other professionals following these standards to help ensure efficient management of these layers. Some of the layer naming guidelines are summarized below:
- A layer name will follow a standard template of Discipline – Major Group – Minor Group – Status.
- The Disciple will be 1-2 letters from A to Z and each group of letter(s) will correspond with each disciple. For example letter A corresponds to Architectural, letter C corresponds to Civil and E corresponds to Electrical.
- The Major Group and Minor Group should ideally have 4 characters. In my professional journey, I have generally seen 4 characters for the major groups but once in a while do see more than 4 characters for the minor group.
- Status refers to which stage or phase the project is. As a civil engineer, I usually put some survey layers on Demo Layers by adding a D suffix to objects that are going to be demolished. This helps me freeze the demo layers in the proposed plans.
Deleting a Layer
There are three major ways to delete a layer in AutoCAD:
– Home > Layer Tab > Layers Drop Down Menu > Delete (Note: The layer drop down menu and layers drop down menu are two different things).
– Type in LAYDEL in the command line and then follow the prompts to delete a layer.
– When in the the Layer Properties Manager, simply click on the Delete Layer button.

Assigning Color to a Layer
The goal of assigning color to layers in AutoCAD is to help differentiate objects on different layers. The plot style of a layer will differ from the plot style of the layer. Below are two major ways to assign color to a layer:
– Home > Layer Tab > Layer Drop Down Menu > Color of a Layer > Assign a Color
– Layer Properties Manager > Color > Assign a Color

Assigning Line Type to a Layer
You can assign line types to layers to help distinguish objects on a plan. On civil and survey plans a thick Phantom line type is generally used for property lines. You can change the line type of a layer in the Layer Properties Manager.

Assigning Light Weight to a Layer
To help distinguish objects further, line weight can be added to layers. Objects with thicker line weight will stand out more than objects with thinner line weight. You choose line weight from 0.00 mm to 2.11 mm. It is also possible to set a default line weight and choose the default line weight option for a layer. The default line weight can be updated using the LWDEFAULT system variable. You can change the line weight of a layer in the Layer Properties Manager.

Assigning Transparency to a Layer
You can set a transparency to a layer from 0% (no transparency) to 90%. Usually the XREF layers have certain transparency associated with them to help the layers in the current drawing stand out. You can change the transparency of a layer in the Layer Properties Manager.
Turning a Layer Off
When you turn off a layer, the objects on that layer will no longer be visible in the model space and also the viewport. Turning off a layer is useful to temporarily operations. AutoCAD will still account for the objects that are turned off when regenerating the view. Below are steps to turn a layer off:
– Home Tab > Layer Tab > Layer Drop Down Menu > Turn a Layer Off
– Layer Properties Manager > Turn Layer Off

Turning a Layer On
You can turn on the layers using the two methods below:
– Home Tab > Layer Tab > Layer Drop Down Menu > Turn a Layer On
– Layer Properties Manager > Turn Layer On
Freeze a Layer
Similar to turning off a layer, when you freeze a layer, it will no longer be visible in the model space. The additional benefit of freezing a layer is that once you freeze a layer, AutoCAD will not account the frozen layers in its memory. This will make other operations faster and provide you a smooth user experience. Below are two major ways to freeze layers:
– Home Tab > Layer Tab > Freeze
– Layer Properties Manager > Freeze

Thaw a Layer
To unfreeze a lay, you will need to thaw a layer. Below are ways to thaw layers:
– Thaw all layers: Home Tab > Layer Tab > Thaw All Layers
– Thaw selected Layer: Layer Properties Manager > Thaw Layer
Viewport Freeze a Layer
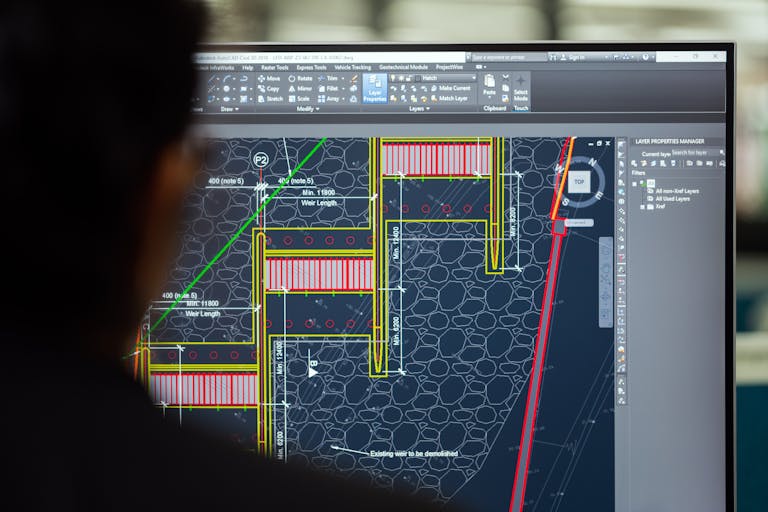
It is possible to freeze a layer in a selected viewport. You can freeze layers in viewport by going inside a viewport, activating freeze command, and selecting layers to freeze. When you are in paper space, you will notice that the Layer Properties Manager will have an additional option – VP Freeze. You can VP freeze layers in the panel by clicking on VP freeze option associated with that layer. The picture below was taken in Paper Space so there is a VP Freeze option in the Layer Drop Down Menu.

Viewport Thaw a Layer
To thaw certain layers that were frozen in the viewport, simply click on VP freeze option again. You will see that the icon will change from a snowflake inside a viewport to sun inside a viewport.
Isolate a Layer
Isolating a layer or group of layers is useful when you solely want to work on objects on certain layers. Simply select the layer(s) you want to isolate and type LAYISO in command line. Alternatively, you can also click on the Isolate icon on the Layer Tab.

Unisolate a Layer
Isolating a layer or group of layers is useful when you solely want to work on objects on certain layers. Simply type LAYUNISO in command line. Alternatively, you can also click on the Unisolate icon on the Layer Tab.

Locking a Layer
If you want to ensure no further changes happen to a layer, you can lock a layer. Below are two ways to lock a layer:
– Home Tab > Layer Tab > Layer Drop Down Menu > Lock a Layer
– Layer Properties Manager > Lock

Unlocking a Layer
If you want to make edits on layers that are locked, you will need to unlock them. Below are two ways to lock a layer:
– Home Tab > Layer Tab > Layer Drop Down Menu > Unlock a Layer
– Layer Properties Manager > Unlock
Locked Layer Fading
If you want to help distinguish locked and unlocked layer, you can add transparency on locked layers. Follow the steps below to fade locked layers:
– Home Tab > Layer Tab > Layers Drop Down Menu > Locked Layer Fading > Add Transparency %

Make Current Layer
The Make Current Layer feature is used change set the current layer to that of the selected object. Simply select an object and type LAYMCUR or choose the Make Current Layer option the the Layer Tab.

Set Current Layer
You can change the current layer in the Layer Properties Manager by selecting a layer and then choosing the Set Current button. You can also ALT+C keyboard shortcut after you select a layer in the Layer Properties Manager or simply double click on the status select of a layer (the icon will change from a blue parallelogram to green check mark).

Match a Layer to Another
Match Layer feature is used to match an object’s layer to an object set to another layer. You can activate this command by clicking on the Match Layer icon in the Layer Tab or typing LAYMCH in the command line. First select the object whose layer you want to change. Then select the object which is on the layer that you want and then press enter.

Set Layer to No Plot
It is a standard practice to use construction lines or other reference objects while drafting. These objects are helpful to draft but you may not want them to plot. It is a standard practice to put these objects on a separate layer and then set the layer to not plot in the Layer Properties Manager.

Search for a Layer in Layer Properties Manager
When in a Layer Properties Manager, you can search for layers in the Search For Layer panel/bar. This search bar will only show the layer whose name matches exactly with your search. If you want to search for a layers with a specific keyword in it, add the asterisk symbol in front and end of your search. This will give you all the layers that have that phrase in it.
Add Description to a Layer
In the Layer Properties Manager, you can add a description for each layer. This is a good practice for ensuring organizing but not on top of my list.
Property Filter for Layers
The property filter is used to filter layers based on one or more properties. Click on the New Property Filter button to get started or use the keyboard shortcut of ALT+P.
Group Filter for Layers
You can create a group filter by selecting the set of layers you want in that group. Click on the New Group Filter button to get started or use the keyboard shortcut of ALT+G.
Invert Filter for Layers
When you check the invert filter option, you will see the list of layers that do not meet the current filter filter criteria.
Refresh the Layer Properties Manager
Updates the layers and their properties in the Layer Properties Manager by scanning all entities in the drawing.
Layer Settings
You can edit the following settings in the Layer Settings Dialogue Box:
- New Layer Notification
- Isolate Layer Settings
- XREF Layer Settings
- Override Display Settings
- Dialog Settings

Previous
To undo last few changes to the layer setting click on the Previous icon the Layer Tab or activating the LAYERP command.

Change to Current Layer
To change the layer of the selected object to the current layer, use the Change to Current Layer feature. Use the LAYCUR command or click on the command icon in Layer Tab.

Copy Objects to New Layer
This feature is used when you want to duplicate objects and be able to put them on a separate layer. Use this feature by activating COPYTOLAYER command or clicking on the command icon in the Layer Tab.

Layer Walk
This tool is pretty cool and you definitely gotta check it out. I have been using AutoCAD for over 8 years and did not know about this command until I started writing this blog post. When you activate the layer walk, the Layer Walk Dialogue Box opens up with a list of all layers in that drawing. When you select a layer, you will see objects on that layer and objects on other layers will be hidden. You can activate it by LAYWALK command or clicking on the Lay Walk icon in the Layer Tab.
VP Freeze in all Viewports except Current
This command does exactly what is sounds like – VP Freezes a Layer in all viewports except the current one. You can activate it by typing LAYVPI in the command line or by clicking the command button on the layer tab.

Merge Layers
Merging layers is helpful when you want to reduce the total number of layers in your drawing. You can activate the command by typing LAYMRG in the command line or click on the merge button Layer Tab.

This was probably a long read for you and congratulations for making it here. While I covered a bunch of features pertaining to Layer Tools in AutoCAD, there is still more. You can override properties of objects on certain layers, modify layer properties on objects on XREF, create Layer States and even have different plot styles for different layers. Checkout my other AutoCAD blogs to learn more!