Mastering AutoCAD Print: An Essential Guide to Professional Plotting

Creating design plots from your AutoCAD model is the final step to transforming digital drawings into professional deliverables. AutoCAD Print is not just about hitting the plot button, but also involves setting plot styles, lineweights, drawing scale, and a lot more. Whether you’re new to AutoCAD or an experienced user, navigating AutoCAD’s plotting can seem overwhelming, but with the right approach, you can get professional-looking plots every time.
As a civil engineer, I can attest that plots are extremely important. Ultimately, clients and review agencies will evaluate the PDF or printed plans, not the designs within AutoCAD. Therefore, it’s essential to ensure that the designs are both engineered accurately and visually appealing. In this blog, I will guide you through the essentials of the AutoCAD print function.
How to start the AutoCAD Print or Plot command in AutoCAD?
In AutoCAD you can print using the Plot Dialog Box. You can open the Plot Dialog Box in AutoCAD in four major ways:
- CTRL+P (Keyboard Shortcut)
- Print Option from Ribbon Area
- Print Option from Application Button (Print Option will open multiple options)
- Type PLOT in Command Line
You can also Batch Plot and Plot using Sheet Set Manager, which I will cover later in the blog.
Dissecting Plot Dialog Box
There are various features associated with the Plot Dialog Box which we will explore below:

Page Setup
As you can see, there are various customization options for AutoCAD Plot. If you are gonna use the same options all the time, it is ideal to add that customization as Page Setup.

How to Add a new Page Setup?
- Choose the Print/Plot options in the Plot Dialog Box
- Click on ADD button in the Page Setup section
- Provide a New Page Setup Name and then hit ok
You also have the option to choose Previous Plot or import a Page Setup settings.
Printer/plotter
There are various printer/plotter settings provided by AutoCAD.
My go to printer/plotter option is DWG to PDF.pc3.
If you have tried other options and feel there is a better one, feel free to leave it in comments.

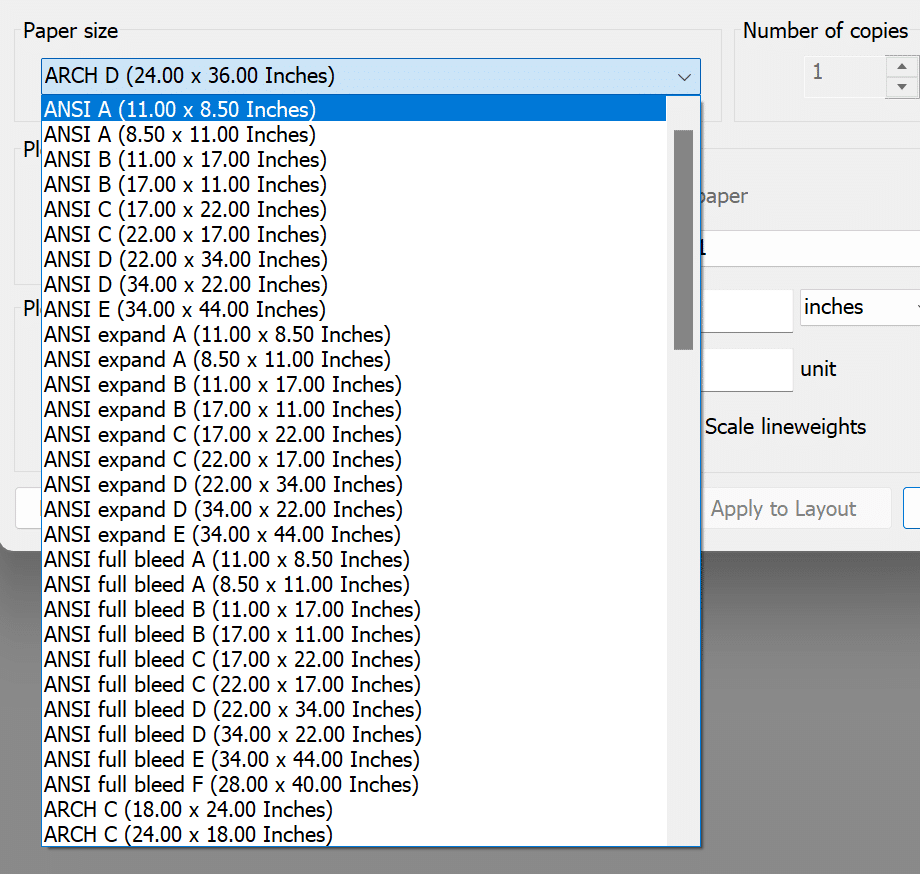
Paper Size
Choose from various industry-standard paper sizes such as Letter, Legal, ANSI, Arch, ISO and more. The page sizes available to plot are based on the Printer/Plotter selected.
Plot Area
There are four options for plot area in AutoCAD which are explained below:
- Display: Plots everything in the current display of the paper space. If you are using this option make sure to choose the plot scale to Fit to Paper.
- Extents: Plots everything in the extents of the paper space, even outside the layout. If you are using this option make sure to choose the plot scale to Fit to Paper.
- Layout: Plots everything in the printable limits of the paper space layout.
- Window: Plots the window or portion of the drawing selected.
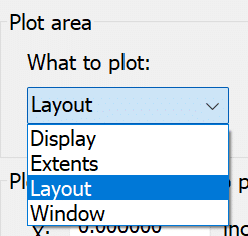
My go-to option is the Layout Option. To learn more about these options in detail or how these options act differently in the model space, checkout the Plot Dialog Box Autodesk 2025 documentation.
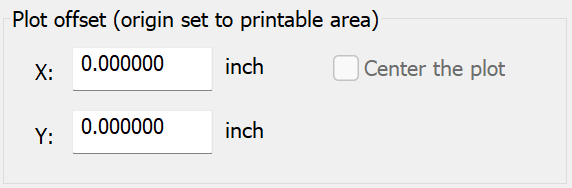
Plot Offset
The Plot Offset refers to offsetting the printable area from the origin (lower-left corner). Once you offset it, you will have the option to Center the Plot as well.
Plot Scale
Keep the Plot Scale in the Dialog box 1:1 and adjust the scale in the viewport. Adjusting the Plot Scale in the Print Dialog Box will be tricky.
Plot Style Table (Pen Assignments)
There are two types of plot styles in AutoCAD: Color-Based Plot (ctb) and Style-Based Plot (stb). By default you will have color based Plot Styles.
Shaded Viewport Options
The Shaded Viewport Options are ideal for 3D models. If you choose any customization options in the Shaded Viewport Option, it will supersede the Plot Table Style settings.
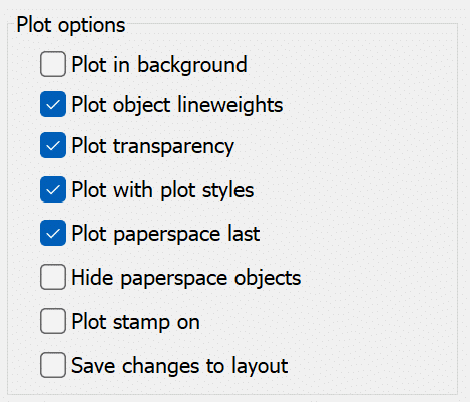
Plot Options
There are various plot options. If you want to use any of the settings below, you will need to check the box for that setting:
- Plot in background: Allows you to plot sheet(s) in the background so that you can continue working in AutoCAD.
- Plot object lineweights: Ensures the lineweights attributed to each object is plotted accordingly.
- Plot transparency: Ensures the applied transparency to objects/hatches is plotted accordingly.
- Plot with plot styles: Ensures the drawing plots based on the selected .ctb or .stb.
- Plot paperspace last: Plots Objects in Model Space first and then Objects in Layout or Paper Space
- Hide paperspace objects: Hides Layout Objects in Final Plot
- Plot stamp on: Adds the plot stamp to sheets
- Save changes to layout: Any changes to plot settings will apply to the layout.
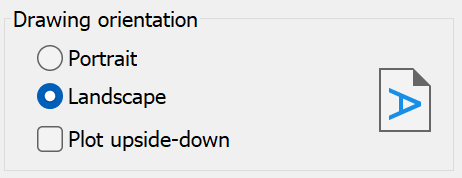
Drawing Orientation
There are three Drawing Orientation options:
1. Portrait or Landscape: Choose whether you want a portrait or landscape setting
2. Plot upside-down: If you wish to plot the layout upside-down, you can check the Plot upside-down button.
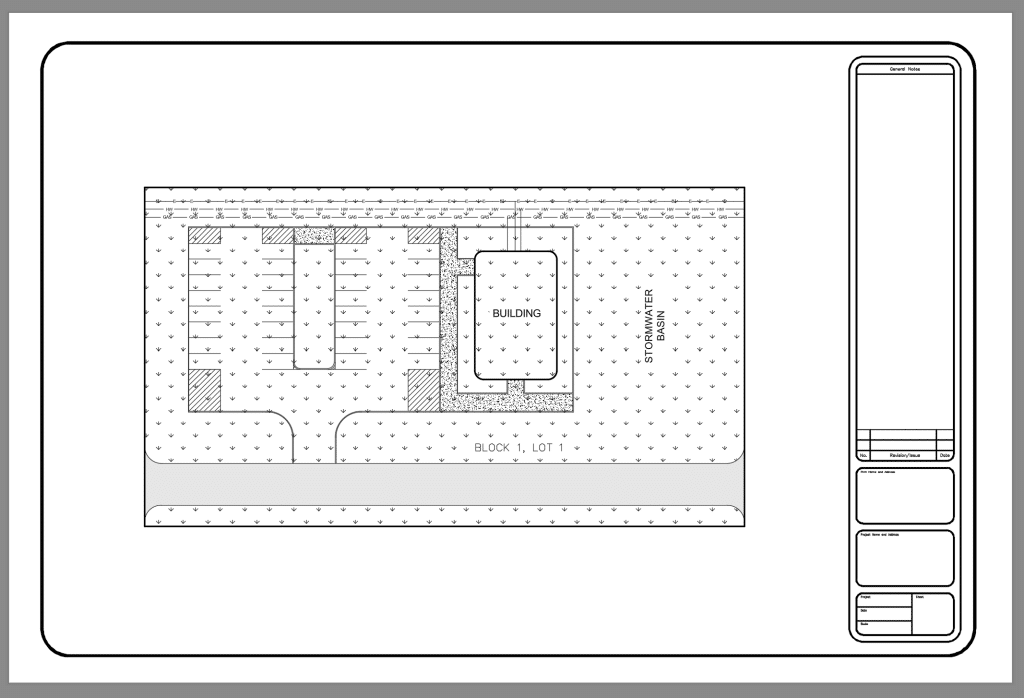
Preview
After selecting all your settings, you can preview your PDF or plot. Use this feature to ensure everything is displayed as you want. Below is the preview of the Utility Plan. Note that both existing and proposed conditions are plotted in black; it would be ideal to change the existing elements to grey.
Batch Plot
Batch Plot is used in AutoCAD when you want to plot multiple Layouts from the same sheet at once. Follow the steps below to Batch Plot:
- First select all the Layout Tabs that you wish to plot. You can select multiple Layouts by holding down on Ctrl button and clicking on the tabs.
- Once all the layouts are selected, right-click on one of the Layouts and hit Batch Plot.
- The Publish Dialog Box will open up. Click on Publish and all the selected sheets will start plotting.

Plot Using Sheet Set Manager
If you have a Sheet Set setup for multiple sheets, you can plot all at once. Follow the steps below to Plot a Sheet Set:
- Open the Sheet Set Manager Dialog Box by typing SSM in the command line.
- Open the Sheet Set that you wish to plot.
- Right-click on the Sheet Set. Choose the Publish option and then the Publish to PDF option.
One or multiple sheets can be published instead of the whole sheet set. Select the sheet(s) and then right-click. To select multiple sheets, hold CTRL and then click on the sheets you wish to plot. Then, follow the same steps as mentioned above.
View Plot and Publish Details
Once you plot a sheet or multiple sheets, a View Plot and Publish Details notification will pop up in bottom right corner. If you click on it, the Plot and Publish Details Dialog Box will open up. This Dialog Box shows various details such as where the sheet is plotted, what is the sheet size, the time the plot was completed, and other print-related configurations. You can see an example of the View Plot and Publish Details Dialog Box below.

Plot in the Background
Plotting can be a time-consuming process when you are plotting multiple sheets at once. To continue working while the sheets plot in AutoCAD, you can plot in the background. Earlier, we saw how to enable plot in the background with the Plot Dialog Box. There is another way to go about it as well. With this approach, you can plot and publish both in the background:
- Open the Options Dialog box by typing OP in the command line or through Application Button.
- Click on Plot and Publish tab.
- In the Background Processing Options, choose Plotting or Publishing options. Plotting refers to printing just one sheet and Publishing refers to printing multiple sheets (Batch Plot).
Frequently Asked Questions
How to Print to Scale in AutoCAD?
To ensure your model is plotted to the ideal scale, double-click inside the Viewport and set the desired scale from the Status Bar.
How to not print Viewport Border in AutoCAD?
Put the Viewport on a NO PLOT Layer and your Viewport Boundary will not plot.
How to Print Multiple Pages in AutoCAD at once?
You can print Multiple pages at once in AutoCAD by using Batch Plot or by plotting through Sheet Set Manager.
How to Print AutoCAD Drawing in Black and White?
To ensure your AutoCAD Drawing Plots in Black and White, make sure to choose Monochrome.ctb. If you are using .stb Plot Styles, make sure the Plot Style is selected to Black & White.
How to Print a PDF in Model Space in AutoCAD?
You can print a PDF in Model Space the same way you print the paper space. Use the keyboard shortcut CTRL+P to open the Print Dialog Box and plot PDF accordingly.
Hope you enjoyed learning about how to plot in AutoCAD. Checkout my blog 25 Foundational Concepts of AutoCAD to learn other features of AutoCAD.